Give us a call
01329 222 345

TRACKING Delivery System
Market-leading reliability built in
Click and Collect
Click and Collect
Buy online & collect in 30 minutes
Rated 'Excellent' on Trustpilot
Outstanding service as standard
Site Visits for Your Projects
Fixings, pull tests and project advice
Trade Account
Trade Account
Apply for online discounts

Give us a call

01329 222 345

Give us a call  01329 222 345

What are Chemical Resin Anchors and how do I use them?

What are Chemical Resin Anchors and how do I use them 2

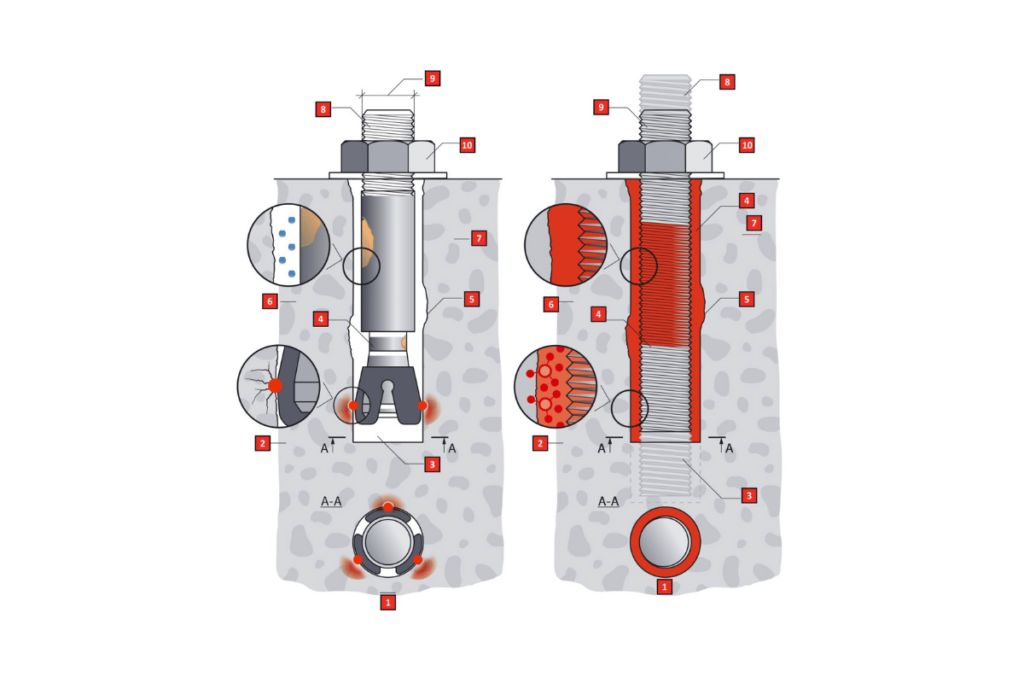
Chemical resin anchors are one of the strongest and safest options available when you need to install a stud or anchor into concrete. With chemical anchoring, a resin is injected into the hole prior to insertion of the fixing stud, creating an incredibly strong anchoring point. This is particularly applicable in applications where the substrate is irregular, or fixings points are close to an edge and therefore at the risk of substrate failure.

With training and product knowledge, chemical resin anchors are simple to install and easy to use. They can be applied in a few minutes and have excellent bonding properties, so they will usually hold during curing time.

What are Chemical Resin Anchors and how do I use them 1

Key Advantages of Chemical Resin Anchors

Chemical resin anchors have a unique combination of properties that make them ideal for many different fixing applications, including:

  1. High-temperature resistance, in some cases up to 350°C
  2. Excellent chemical resistance to most oils and chemicals, including acids, bases, solvents and alcohols
  3. Highly resistant to ageing, oxidation and corrosion
  4. Can be used with hollow sockets to create a removable fixing point
  5. No expansion is applied to the substrate, thereby creating a low-stress fixing point
  6. Load is spread across full embedment of anchor, as opposed to mechanical fixings
  7. Exceptional performance in seismic conditions, and areas of high vibration
  8. WRAS approval makes them safe to use in drinking water and swimming pool areas
  9. F240 fire rated
  10. ETA approval

How to use chemical anchor resin to fix studs and anchors

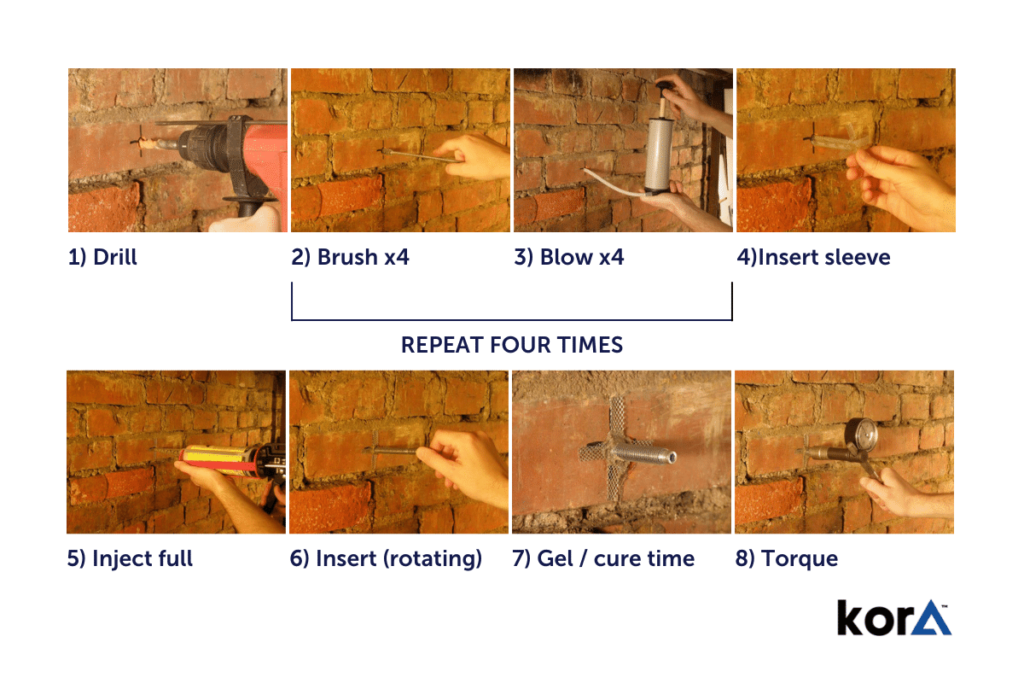
Installing a chemical anchor is easy and only involves four easy steps.

How to install a chemical anchor

DRILL THE HOLE

Studs are typically available in sizes of 8, 10, and 12mm.

SDS drill bits are required for this, and a standard over-size of at least 4mm on the diameter is required – an 8mm stud will require a 12mm drill bit, and so on.

Clean the hole to remove all debris and dust

You can use various types of brushes or air, either by blowing down a tube using a dust pump (wear a dust mask and eye protection) or by using an air compressor. A vacuum cleaner should ideally be used in this instance. We recommend cleaning by carrying out 2 x air pumps, then 2 x hole brush cleans, then a repeat of both steps.

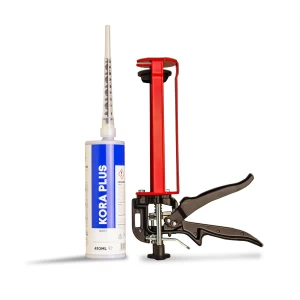
Inject the chemical resin using an applicator gun

When using an applicator gun, it is vital to make sure that the gun is equipped with an extension tube of sufficient length and diameter to reach the bottom of the hole.

To apply the resin without trapping air, inject lightly while slowly removing the tube from the hole. Pre-mark the tube to 2/3rds hole depth with tape for accurate, waste-free injection so that you may stop pressing the trigger when the tape appears.

Multiple applicator guns are available and it is vital to select the appropriate gun for the type of resin you are using. Pure epoxy resins mixes in the nozzle and are typically used with wider bodied guns. Polyester anchor resins are faster than epoxy resins and are best suited for situations that demand rapid setting of anchors.

Use electrical tape to mask the threaded stud

To avoid resin contamination that could clog the threads, make sure the tape goes over the region that needs to accommodate the nut

Wear protective gloves and slowly rotate the stud while inserting it into the resin-filled hole.

Allow to cure and set well

After inserting the anchor bolt, stud, or threaded bar into the drilled hole that is now filled with resin, you must wait for the resin to solidify before attaching anything to it. The curing time for this information should be printed on the resin container.

The curing time is slightly longer in winter environments, so the construction period is longer. As soon as the concrete cures, the fixing is ready for use.

How to install a chemical anchor 1

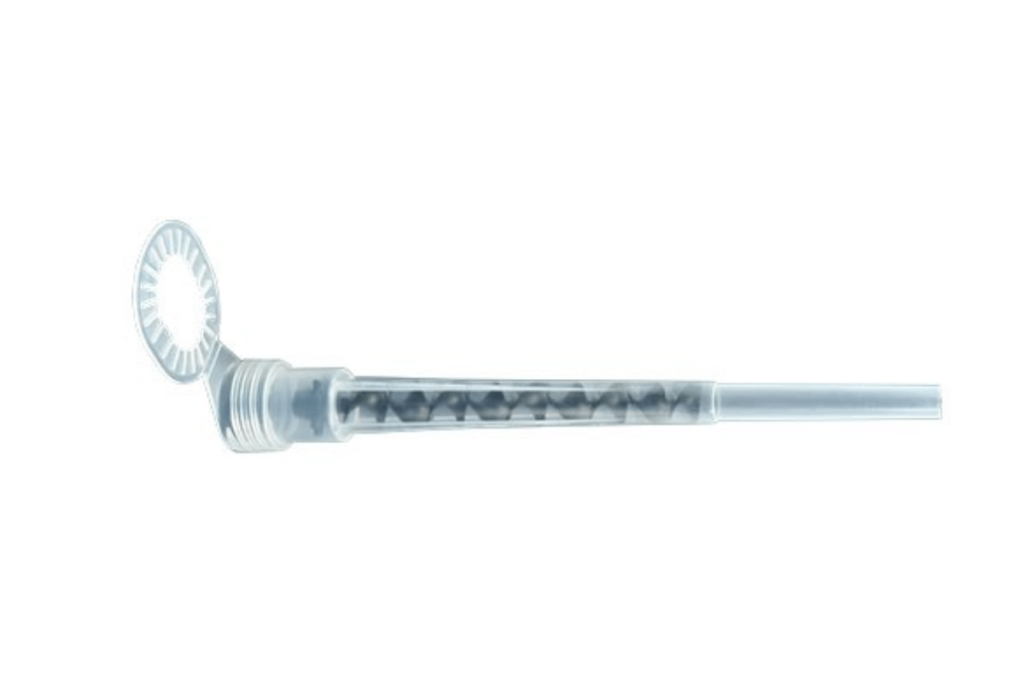
Importance of the mixing nozzle

A benefit of using single cartridge tubes is that hand mixing is not required. The resin mixes inside unique mixing flutes within the spiral nozzle. It is crucial to replace the mixer nozzle if the resin hardens before the tube is empty, which is why we recommend ordering multiple nozzles for the project.

How to install a chemical anchor 2

What about cavities?

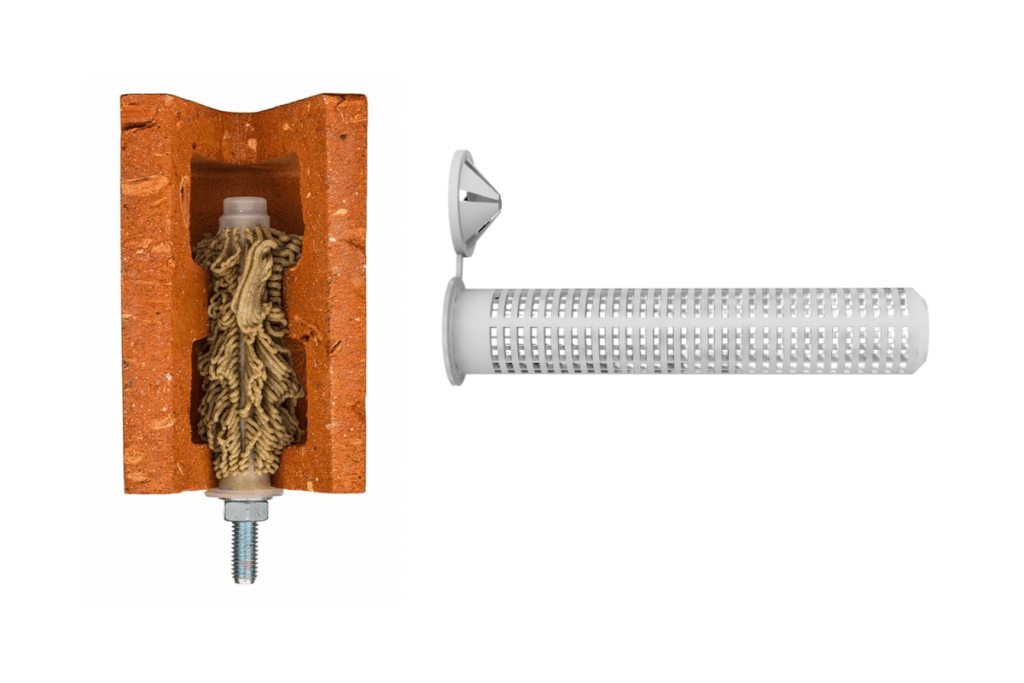
Chemical resin installations in cavity situations are overcome by using resin sleeves. These are available in different diameters and sometimes can be supplied in a 1m length which is then cut to length. They allow for resin to be inserted into a cavity situation, whereby the resin is held in place by the mesh sleeve, expanding and hardening within the cavity, providing an exceptionally strong bulb-effect fixing once cured.

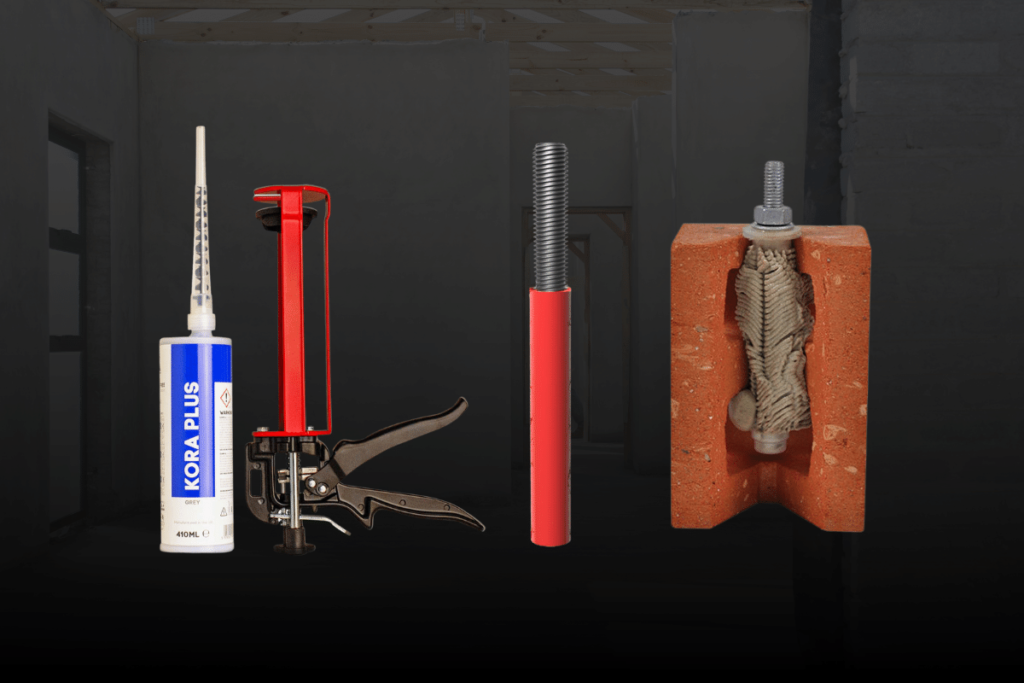
Discover Kora’s Chemical Anchor Resin

Kora’s ETA approved vinylester styrene free chemical anchor resin is an ultra strong chemical anchoring system.

It is made from an extremely strong bond-forming formulation made from vinylester SF resin and is intended to secure threaded rods and studs into concrete.

It is best suited for MEP installations in cracked and non-cracked concrete.

Characteristics

  • Ideal for use in seismic applications under C2
  • High loads can be accommodated within standard annulus and embedments
  • Rapid working times for early loading in time-sensitive applications
  • Suitable for indoor and enclosed spaces due to no styrene
  • Engineered for wet and flooded environments and fixing holes
  • High chemical resistance and superb durability
  • Used for studs and rebar
  • Available with colour change technology (Blue to Grey gel indicator)
  • Fixings in concrete, wood and other high-strength materials